A comprehensive guide to creating, organizing, and publishing content in your WordPress.
This article delves into the heart of content creation: post management. We will explore the fundamental differences between posts and pages, guide you through crafting your first article with the powerful Gutenberg editor, and detail the organizational tools of categories and tags. Finally, we’ll cover the essential settings that control your post’s visibility, scheduling, and presentation.
1. Difference between Posts and Pages
WordPress uses two primary content types: posts and pages, each serving distinct purposes. Posts are designed for dynamic, time-sensitive content, such as blog entries, news articles, or recipes. They are displayed in reverse chronological order, with the newest appearing first on your blog page. Posts support categories and tags, enabling organization and easier navigation for readers. For example, a food blog might categorize posts under “Desserts” and tag them with “chocolate” or “vegan.”
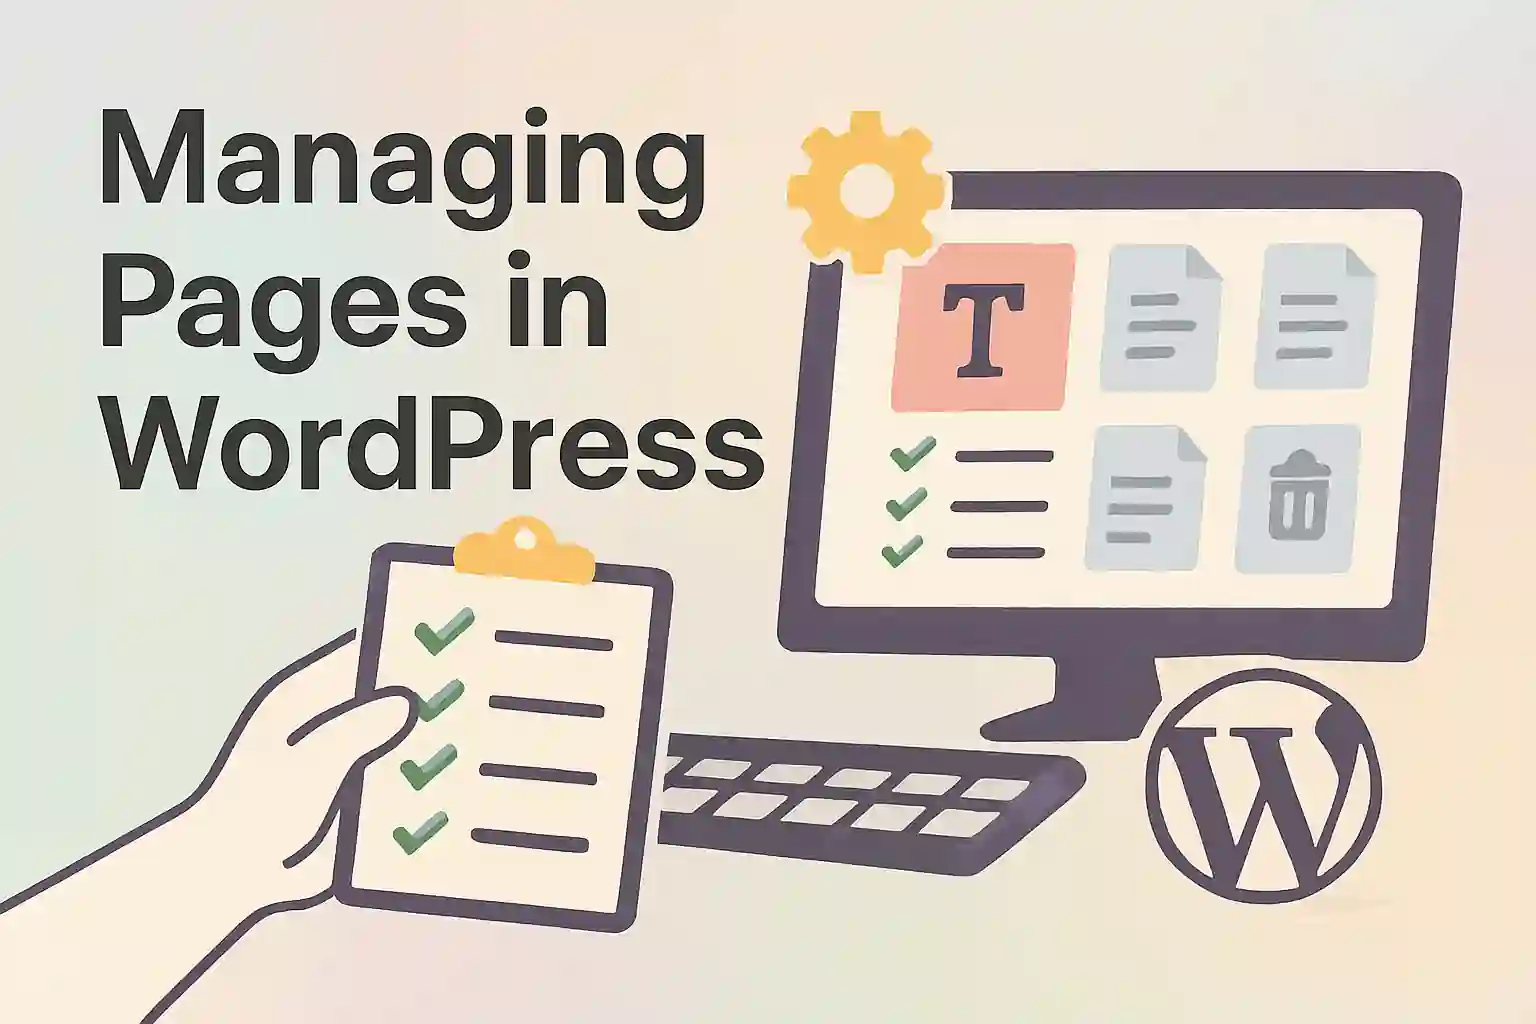
Pages, conversely, are for static, evergreen content that forms the backbone of your site, such as “About Us,” “Contact,” or “Services” pages. Unlike posts, pages do not appear in the blog feed, lack categories and tags, and can be organized hierarchically with parent and child pages (e.g., “Services” as a parent with “Consulting” as a child). Pages are typically linked in the site’s navigation menu for easy access.
| Aspect | Posts | Pages |
|---|---|---|
| Purpose | Dynamic, regularly updated content | Static, timeless content |
| Order | Reverse chronological | Standalone, no specific order |
| Categories/Tags | Yes | No |
| Navigation | Not automatically in menus | Often in navigation menus |
2. Creating Your First Post
Creating a post in WordPress is straightforward and leverages the intuitive Gutenberg block editor.
2.1 Accessing the “Write Post” Interface
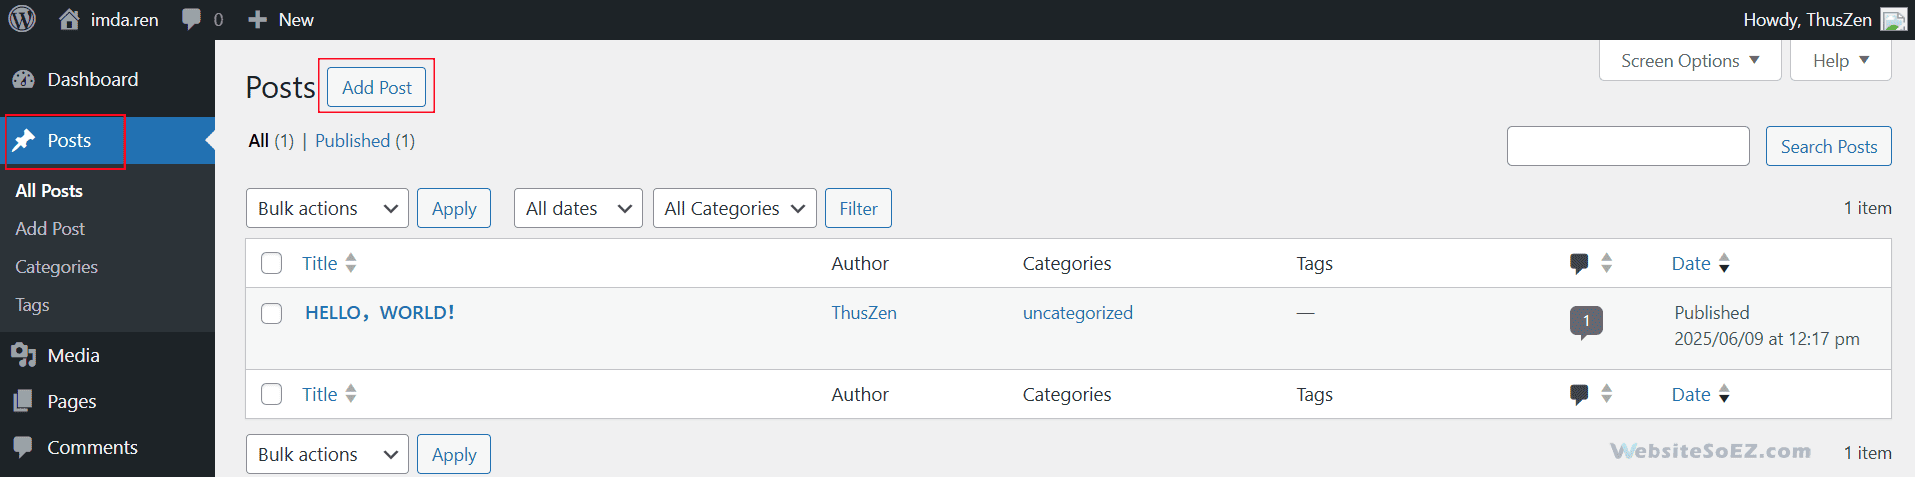
To start, log into your WordPress dashboard. From the left-hand menu, select Posts and click Add Post. This opens the post editor, where you can begin crafting your content.
2.2 Title and Content Editor (Introduction to Gutenberg Editor)
The Gutenberg editor, introduced in WordPress 5.0, is a block-based system that simplifies content creation. Each piece of content—text, images, videos—is a block, allowing flexible layouts.
Basic Use of the Block Editor
- Title Field: Enter your post’s title at the top in the “Add title” field.
- Adding Blocks: Click the + icon to open the block inserter. Search or browse for blocks like paragraphs, headings, or images. Alternatively, type / followed by the block name (e.g., /image) to insert it quickly.
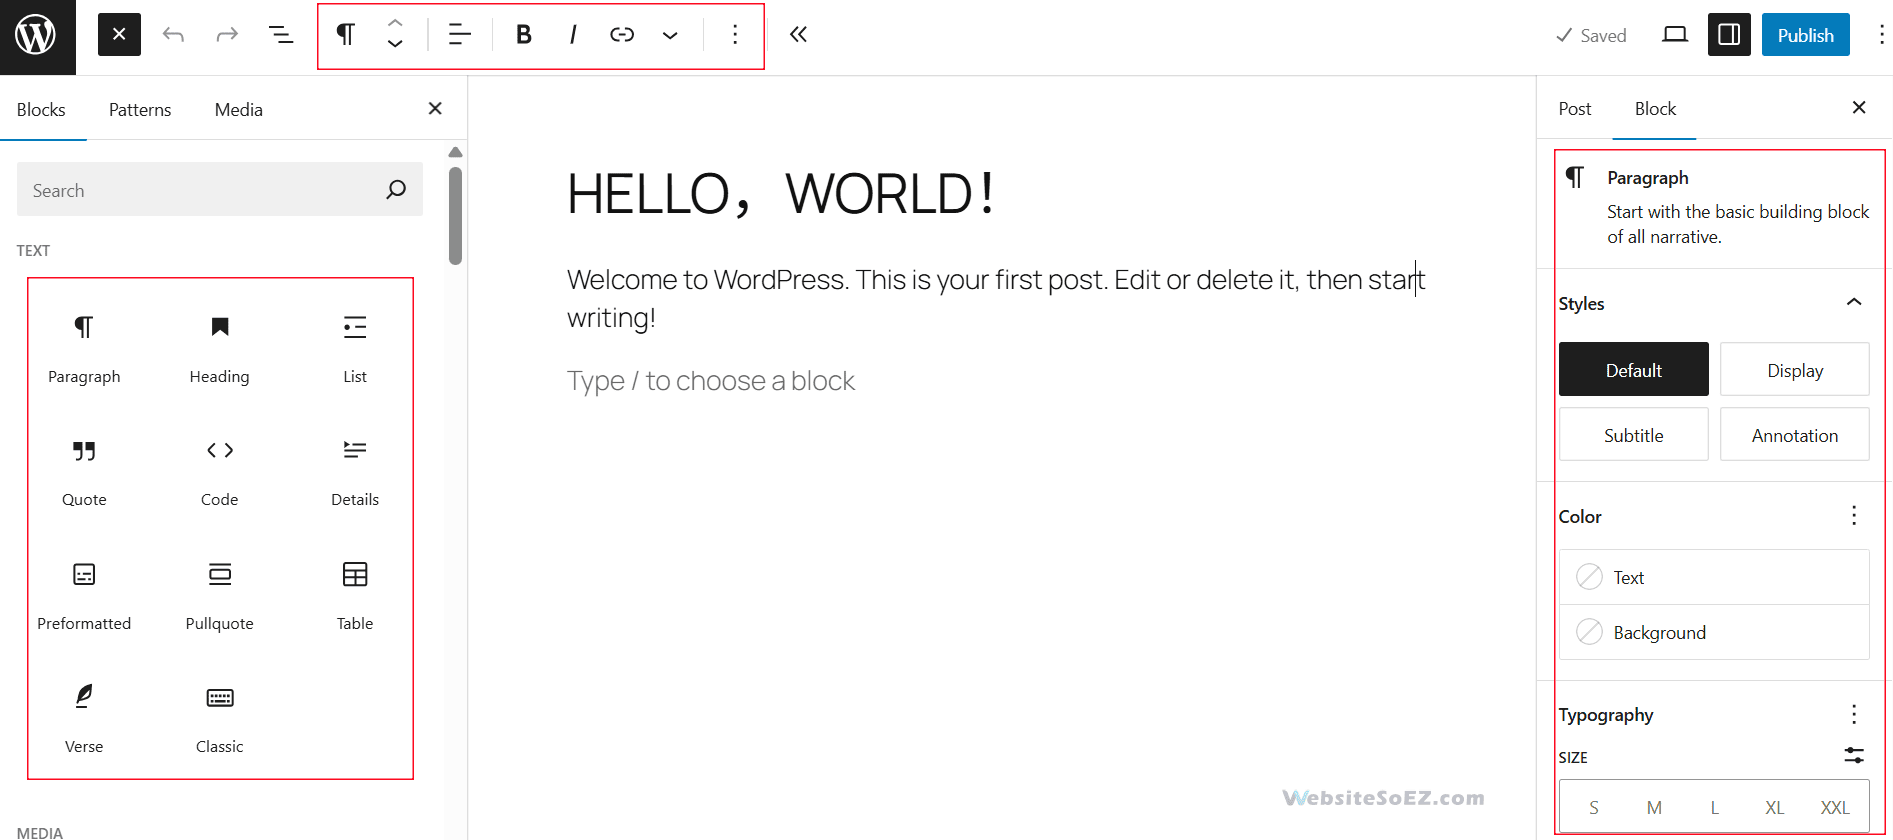
- Editing Blocks: Each block has a toolbar for formatting options (e.g., bold, italic, alignment) and a settings panel on the right for advanced customization, such as text color or image size.
- Rearranging Blocks: Drag and drop blocks using the handle or use the up/down arrows in the toolbar to reorder them.
- Saving Patterns: Group multiple blocks and save them as reusable patterns via the block options menu for consistent layouts across posts.
Common Blocks
The editor offers various blocks to enhance your posts:
- Paragraph: For standard text.
- Heading: For section titles (H1–H6).
- Image: To insert single images with alt text for accessibility.
- List: For bulleted or numbered lists.
- Quote: To highlight quotations with optional citations.
- Gallery: For displaying multiple images in a grid.
- Embed: For adding content from platforms like YouTube or X by pasting a URL.
- Button: To create clickable call-to-action buttons.
For advanced layouts, use the Columns block to place content side by side or the Cover block for full-width images with overlaid text.
2.3 Post Formats
Post formats are optional theme features that define how a post is displayed. Not all themes support them, but those that do offer formats like:
- Standard: Default for regular posts.
- Aside: Short notes, often without a title.
- Gallery: Image-focused posts.
- Link: Posts highlighting external URLs.
- Quote: For showcasing quotations.
- Video: Video-centric posts.
- Audio: For audio files or podcasts.
To apply a format, check your theme’s documentation to confirm support, then select the desired format in the post editor’s Status & Visibility settings. Note that post formats are less commonly used in modern themes, which often rely on blocks for styling.
3. Post Categories
Categories help organize posts into broad topics, improving site navigation and user experience.
3.1 What are Post Categories?
Categories are a default WordPress taxonomy for grouping related posts. For instance, a news site might use categories like “World News,” “Sports,” or “Opinion.” Every post requires at least one category; if none is assigned, it defaults to “Uncategorized.”
3.2 Creating and Managing Categories
To create a category:
- Navigate to Posts > Categories in the dashboard.
- Enter the category Name (e.g., “Recipes”), Slug (URL-friendly version, e.g., “recipes”), and optional Description.
- Click Add Category.
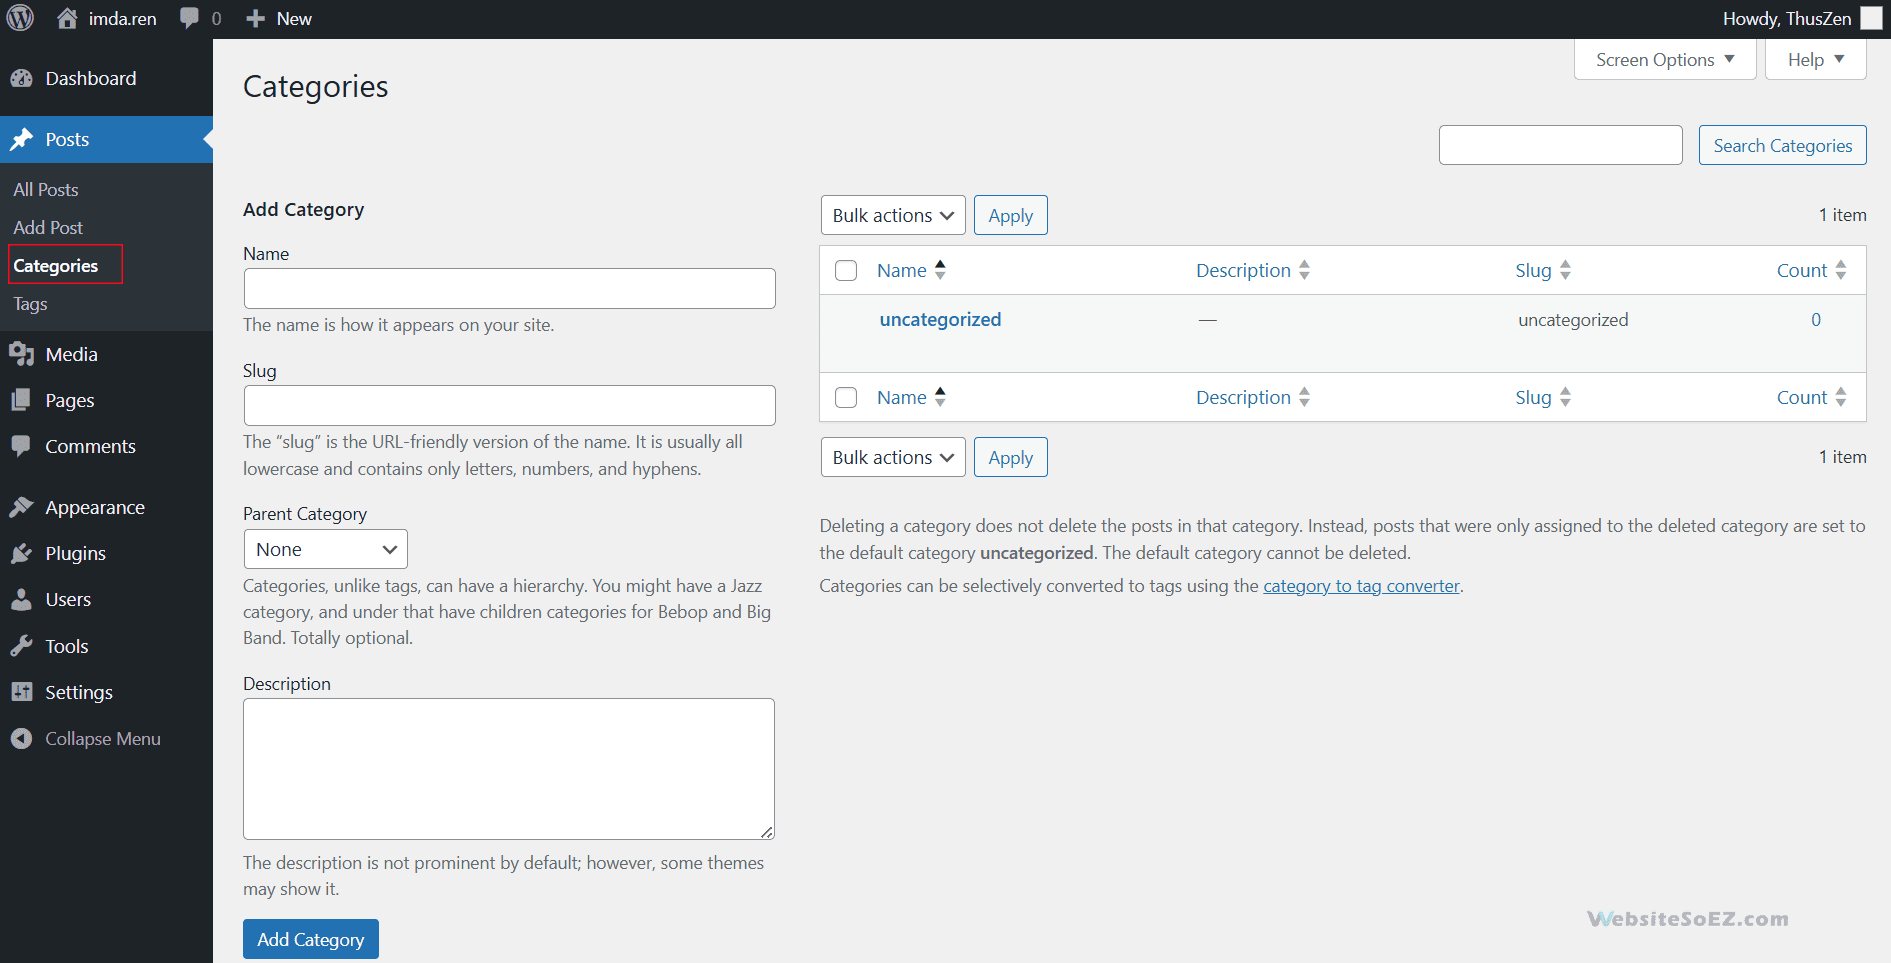
To assign categories to a post, check the relevant boxes in the Categories panel while editing. Manage existing categories on the same page, where you can edit names, slugs, or delete unused ones.
3.3 Hierarchical Structure of Categories
Categories support a hierarchical structure, allowing subcategories. For example:
- Parent Category: Travel
- Subcategory: Europe
- Subcategory: Asia
To create a subcategory, select a parent category during creation. This structure helps organize content logically, such as grouping “Paris” under “Europe.”
4. Post Tags
Tags complement categories by adding specific descriptors to posts.
4.1 What are Post Tags?
Tags are keywords that highlight specific details of a post, such as “gluten-free” or “quick prep” for a recipe post. Unlike categories, tags are optional and non-hierarchical, allowing flexible content association. Clicking a tag displays all posts sharing that tag.
4.2 Creating and Managing Tags
To create a tag:
- Go to Posts > Tags in the dashboard.
- Enter the tag Name (e.g., “vegan”), Slug (e.g., “vegan”), and optional Description.
- Click Add Tag.
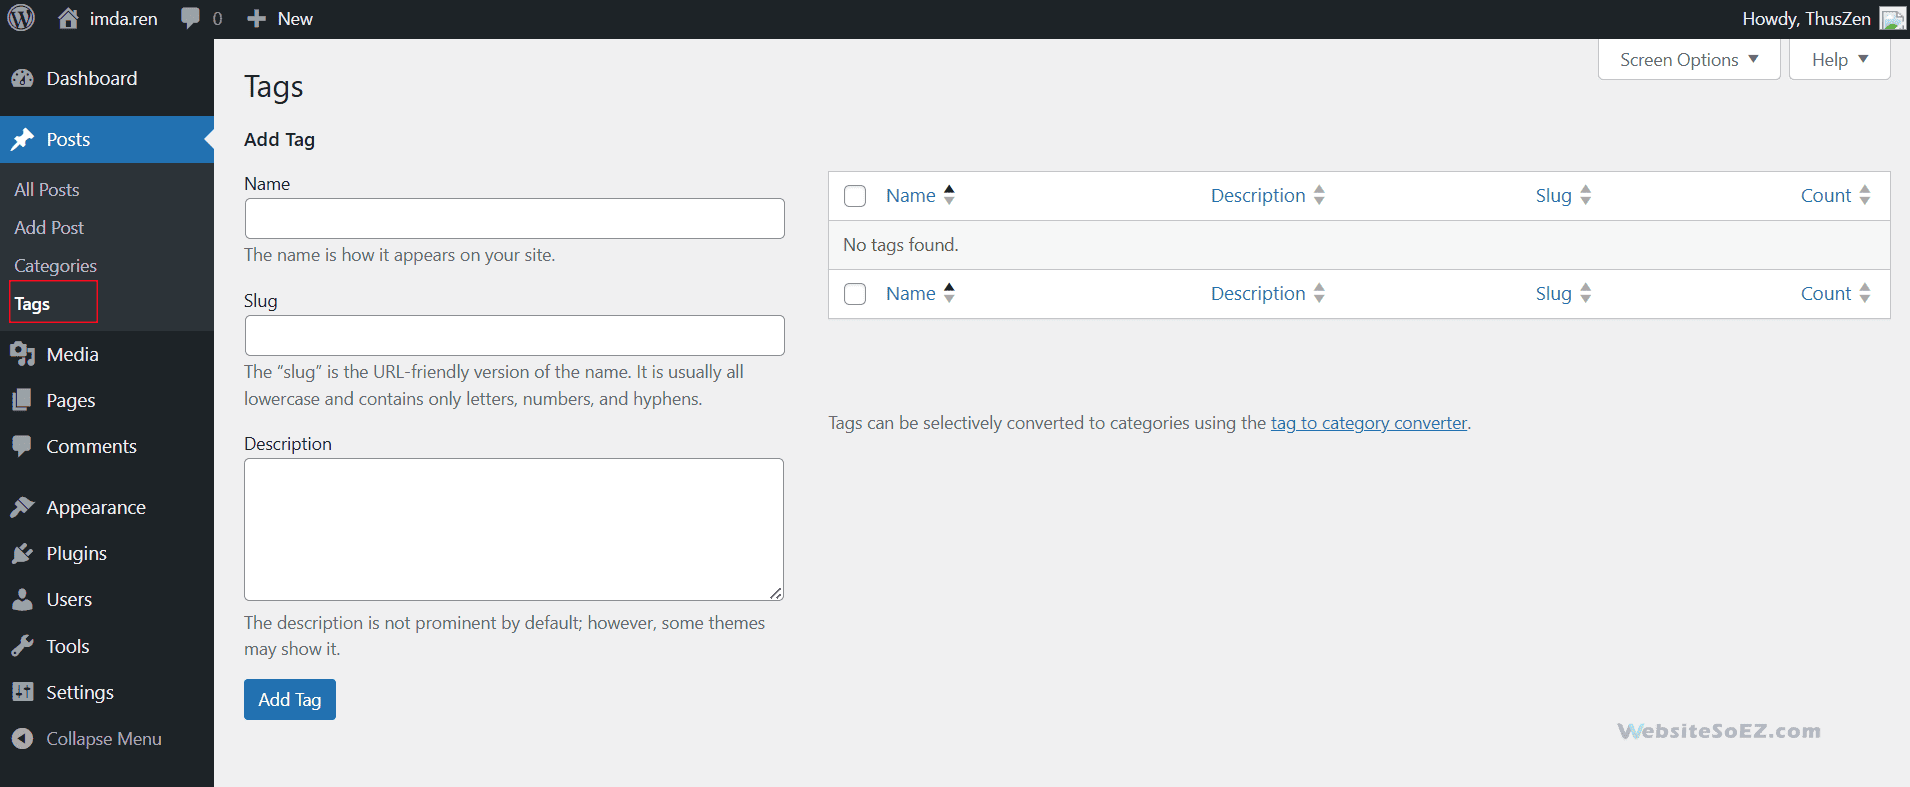
Alternatively, add tags directly in the post editor’s Tags panel by typing keywords separated by commas. Manage tags on the Tags page, where you can edit or delete them. The Count column shows how many posts use each tag.
5. Post Publishing Settings
WordPress offers flexible options to control how and when posts are published.
5.1 Visibility
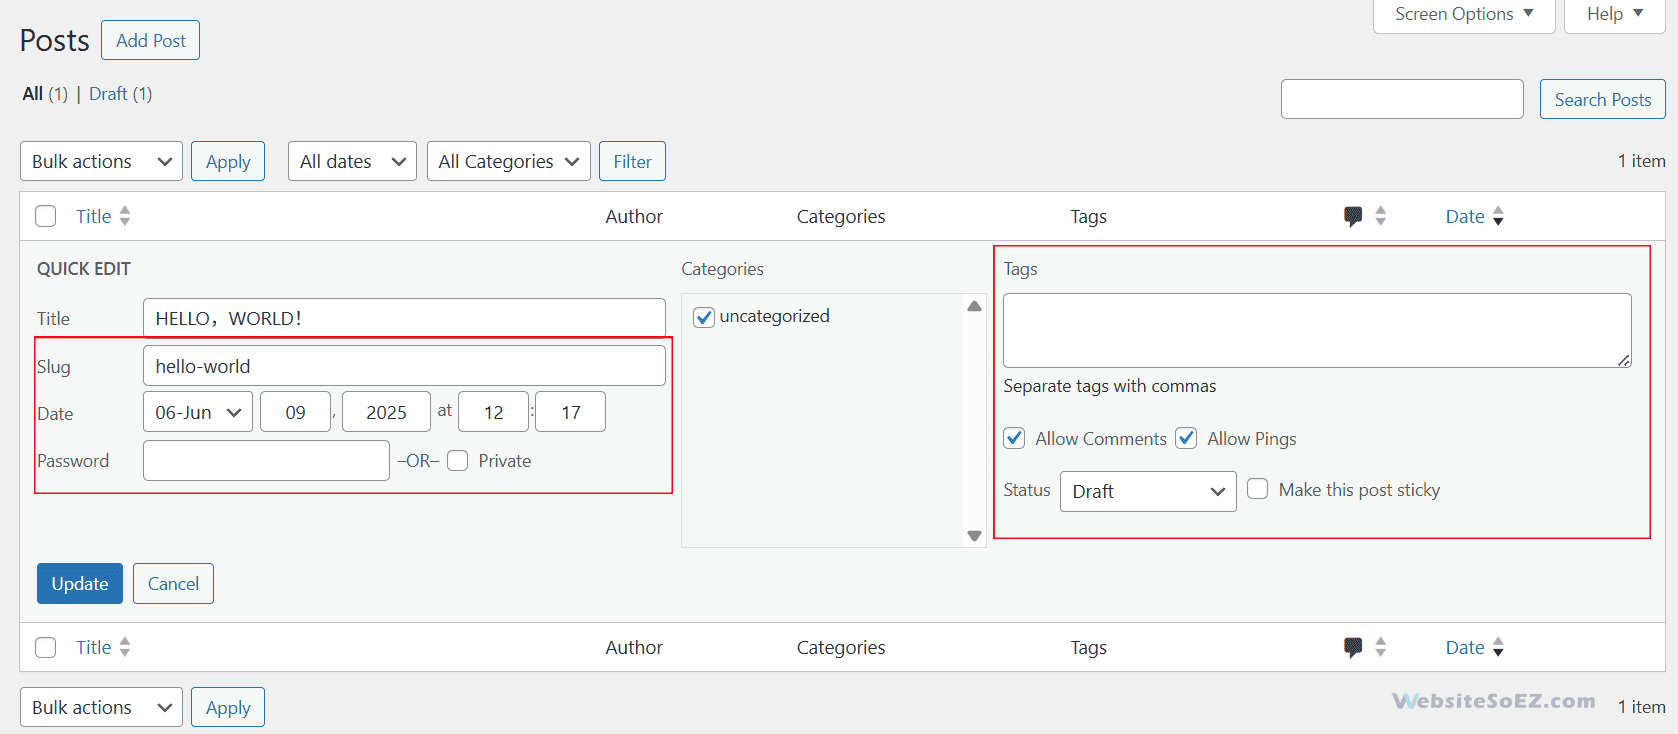
Set a post’s visibility in the Status & Visibility panel:
- Public: Accessible to all visitors.
- Private: Visible only to logged-in users with appropriate permissions (e.g., editors or admins).
- Password Protected: Requires a password to view, ideal for exclusive content.
5.2 Immediate Publishing and Scheduled Publishing
Posts can be published immediately or scheduled:
- Immediate: Click Publish to make the post live.
- Scheduled: Click the calendar icon next to “Publish immediately,” set a future date and time, and click Schedule. Scheduled posts appear in the “All Posts” list with a “Scheduled” status.
5.3 Slug
The permalink is the permanent URL for your post. By default, it’s generated from your post’s title. For SEO purposes, it’s good practice to ensure your permalink is clean, descriptive, and contains your primary keyword. You can edit it directly under the title field.
5.4 Featured Image
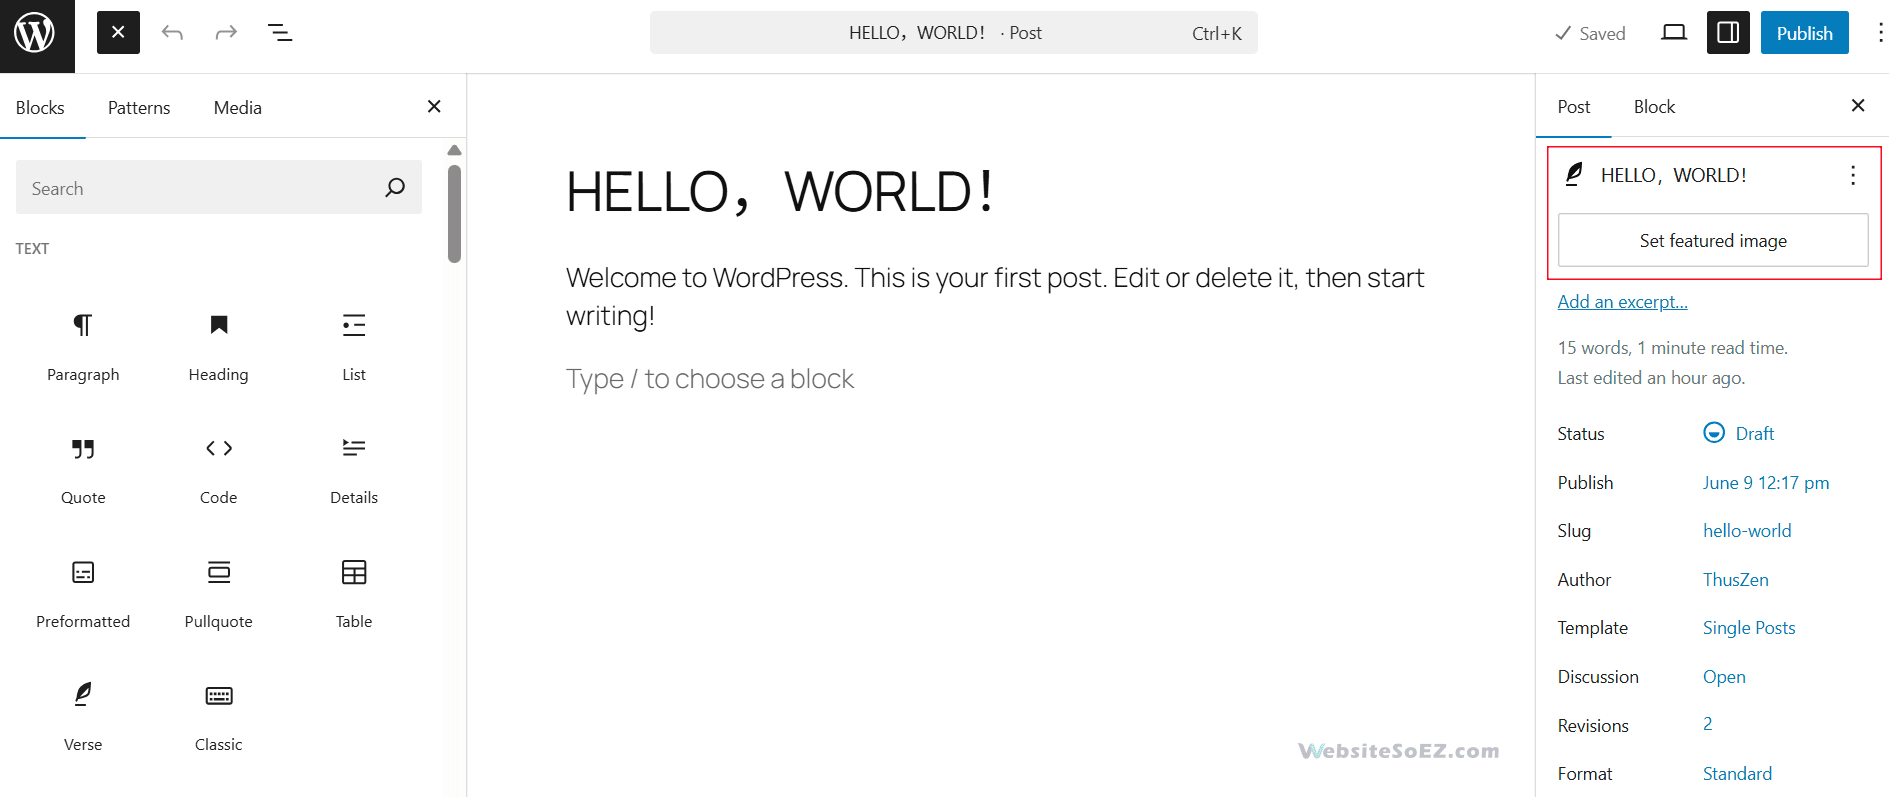
A featured image represents your post on your main blog page, in archives, and on social media. It’s a visual hook for your article. You can set a featured image from the dedicated section in the right-hand sidebar.
6. Managing All Posts
The main “Posts” screen in your dashboard is your command center for all your articles.
6.1 Filtering and Searching for Posts
At the top of the “All Posts” screen, you’ll find options to filter your posts by date or category. There is also a search bar on the right to quickly find a specific article.
6.2 Bulk Editing and Deletion
By using the checkboxes next to each post, you can select multiple articles at once. From the “Bulk Actions” dropdown menu, you can then choose to edit multiple posts simultaneously (for instance, to assign them all to a new category) or move them to the trash.
Next Article → We will explore how to manage media files, including uploading and organizing images, videos, and other attachments in WordPress.